


Autumn
To create the background I used a new image of 150px x 20px and filled using the autumn preset flood fill. I then selected the background colour which I wanted the rest of the background to be using the dropper tool, then resized the canvas to create the background for the rest of the page.
Creating the buttons was a pretty simple process. I created a new image 200px x 200px using the same background colour as the overall background colour of the background image. I created a new layer and used the picture tube to find the right leaf. I cropped the image to fit roughly around the leaf then created a new layer. On the new layer I placed the text using the text tool, no stroke colour, fill colour of white, font of arial 24, floating and antialiased. I then used the 3d effect of chisel set to 3 with a colour of the same background colour as the image. I then set the transparency to the background colour, reducing the colour depth to 256 with an optimized median cut. Having saved a PSP master image before reducing colours etc, I was able to create all the other buttons by changing the text layer.
Although where the drop shadow on the leaf is nearly the same colour as the background, I quite like the effect as it brings the leaves into the background, rather than separating them totally into the bar.
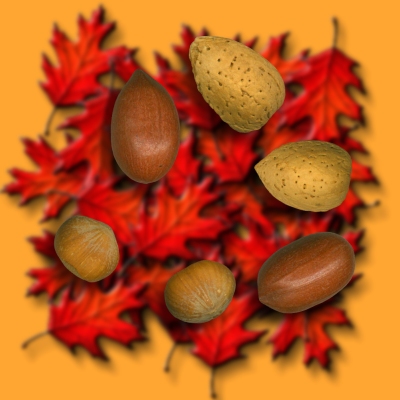
Creating the image map was fun. I created a new image, again with the background set to the same orangey colour, Created a new layer and used the same leaf from the tube to create the background. I created another new layer and used the nut tube on this. I swapped back to the leaf layer and applied a gaussian blur of 2 to make the nuts stand out more. I used the image mapper function within PSP to create the code and saved the image as a jpg.